During these uncertain times, it’s important to find creative and safe fun for your family. However, after so many months of pandemic conditions, it’s easy to run out of ideas. Our family found one more source of fun by creating a cozy outdoor Hollywood experience in the comfort of our backyard.
Here is a safe way to host your own backyard movie night and turn any outdoor space, no matter what size, into a home theater. Cover all your bases with the following products and suggestions. Your kids will enjoy it so much, you might even be able to sneak in a documentary!
Assemble the equipment
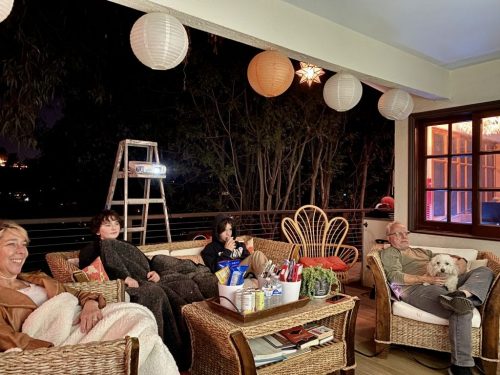
The most important technical element for your outdoor theater is the projector, on which you can spend anywhere from $69 to $1,600.
A projector is a more effective outdoor viewing device than your TV, since your television is likely too small. It also needs to be plugged into a wall outlet and can be difficult to move outside and keep stable in an outdoor setting. Make sure you choose a projector of the proper size. You want one small enough that you’ll be able to move it outside.
Other important considerations when choosing your projector include its resolution, brightness and speakers. Many projectors take a high-resolution image and compress it into a lower quality one. If you want true HD content, you should choose a higher-end projector. Another factor in picture quality is brightness. The brighter your projector, the brighter and clearer the image that will appear on your screen. Keep in mind that the farther away the projector is from the wall, the larger the image will appear on screen.
Another important basic element is the media player, with prices ranging from $24.99- $1,099. If your Wi-Fi signal reaches your backyard, you can use a media player the size of a thumb drive that will just plug directly into your projector. If your Wi-Fi signal can’t reach your yard, you can try downloading movies and playing them directly from your laptop. You will likely need an HDMI adapter to connect the laptop to the projector. You can also play your movies on a DVD or Blu-ray player. You’ll just need to buy the proper cables to connect your media player to the projector.
The next technical element is your screen. At the low end cost of the spectrum, hanging a bright white sheet (costing as little as $11) is pretty much the easiest and most affordable solution. Just tie a wire or sturdy rope between two poles, trees or other structural supports, and use two clips to hang the sheet. Finish off by securing the sheet to the ground with some weighted objects to avoid it blowing in the wind and—viola!
At the more expensive end of the spectrum, purchasing an actual screen with a sturdy frame and ground stakes will give you the clearest image out of whatever projector you choose. These can cost as much as $600. You can also get a large blowup screen, but you are going to have to do some blowup work before each movie.
The final basic elements include speakers and extension power cords. Many projectors have speakers built in, but they won’t provide the best or loudest sound quality. For the noise to really travel, you’ll want to use the projector’s analog output and either a 3.5-mm-to-3.5-mm stereo cable or a 3.5-mm-to-RCA cable to connect a soundbar or a Bluetooth speaker, which can cost from around $40 to $1,750. You will also likely need an extension cord for your outdoor theater unless you luck out and you have an outlet close to where your projector will go. Cords and cables can cost $12-$65.
When shopping for our home theater equipment, we set price alerts for what we needed on www.price.com. We splurged on picture and sound and wound up using a white sheet to start our endeavor.
Add atmosphere
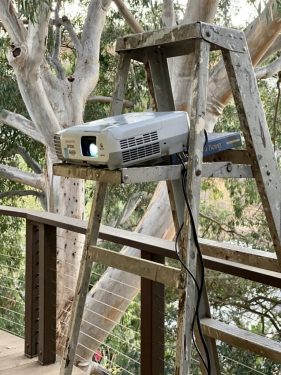
Setting up some good lighting will help create a welcoming ambiance for your outdoor theater. Use string lights, lanterns and flameless LED candles to add atmosphere. These are ideal since you want your lighting to be dim enough that you can keep the screen in clear view.
You can also provide glowsticks to amp up the fun factor for your kids. Consider setting up walkway lights or supplying flashlights to help keep everyone from stepping on any of the equipment.
Amp up the lounge factor
Give yourself and the kids something to lounge around on for the evening. Folding chairs and camping chairs work well if you’re arranging the seating on a hard surface. If you’ve got plastic chairs, consider draping them with something like plush towels. You could also set out blankets, pillows and beanbags on the grass. Whatever you’ve got for seating, you just want it to be a comfortable environment since you’ll be seated for a couple of hours.
Consider comfort
To really elevate everyone’s comfort level, simply add a basket of blankets, because warm blankets will go a million miles. This is a great way to make your outdoor theater feel special. We splurge on UGG blankets. Just give everyone their own blanket, and I promise you’ll hear no complaints. If necessary, provide citronella candles and bug repellant to keep insect visitors at bay.
 Have fun with food
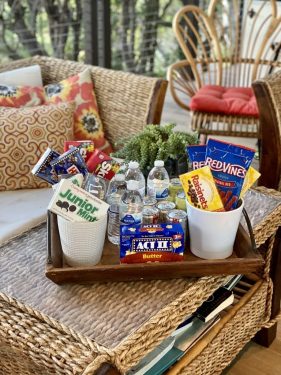
A makeshift concession stand is the cherry on top of your theater under the stars. Serve all the traditional refreshments to make it feel like a real movie theater: individual bags of popcorn, candy and sodas. Add a fun little place to put them, such as an old wheelbarrow, just to make the food stand out.
And there you have it. With a little investment of cash and creativity, your family is ready for lights, camera, action!
Margot Black is a storyteller with more than 15 years of experience, an L.A.-based traveler, wife and mom.

