Hooray for the holidays – lights, music, love, joy and a chance to spoil family and friends with delicious homemade food from your cozy kitchen.  

What? Holiday cooking isn’t your absolute favorite thing to do? You avoid the kitchen most of the year, and get stressed out by the pressure to produce a festive meal?  

Relax, take a deep breath and a different approach this year with these sweet recipes:

Baked Pumpkin Doughnuts with Buttermilk Glaze 

Courtesy Sur la Table 

holiday dessert recipes
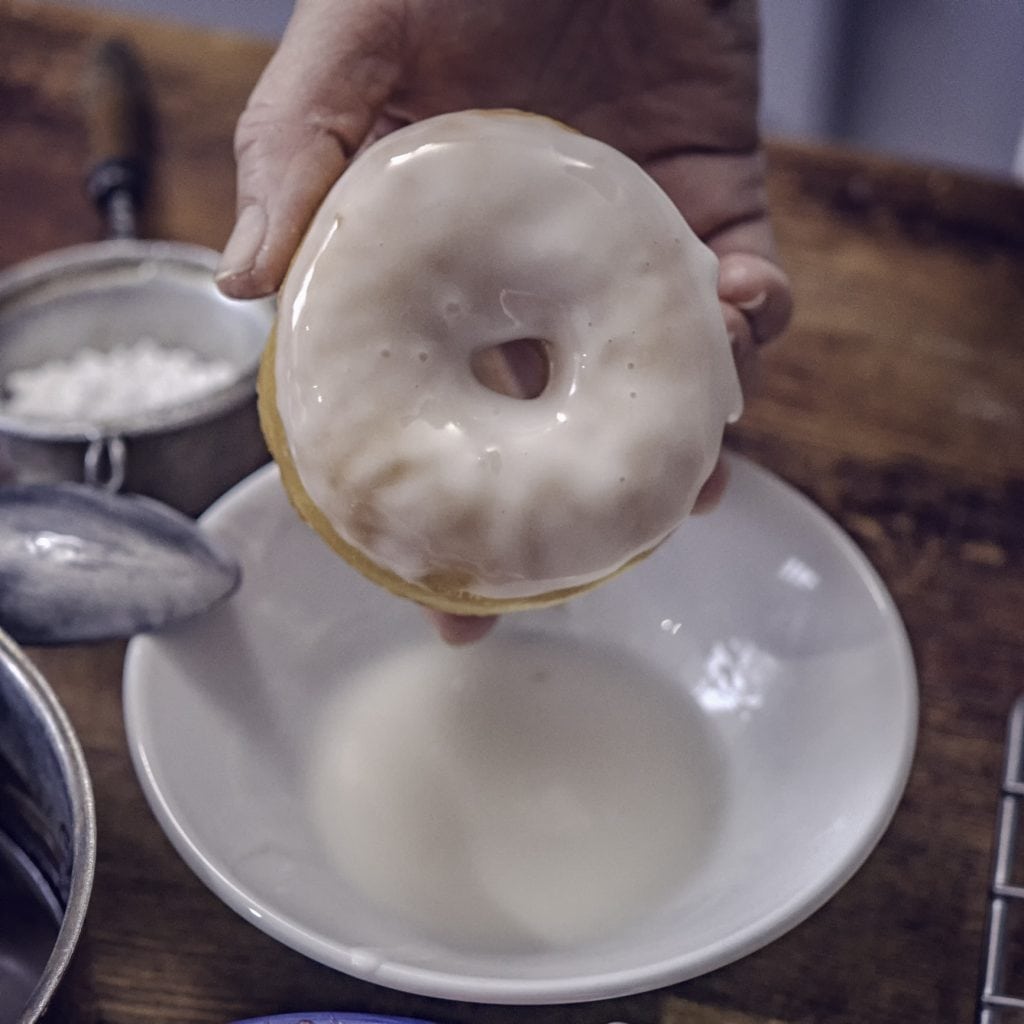
These make a fun dessert – or a festive breakfast. If you don’t have a pastry bag, you can substitute a plastic bag with a hole cut in the corner. Leonard warns not to over-mix the batter, or the doughnuts will be tough. 

Don’t love buttermilk? You can use regular milk in the glaze instead. 

Yield: 12 medium or 24 mini doughnuts 

3 cups unbleached all-purpose flour 

1 teaspoon sea salt 

1 teaspoon baking powder 

1 teaspoon baking soda 

¾ teaspoon ground cinnamon 

½ teaspoon freshly grated nutmeg 

¼ teaspoon ground cloves 

¼ teaspoon ground ginger 

2 cups firmly packed light brown sugar 

1 cup vegetable oil, plus more for preparing pans 

3 cups pumpkin puree 

2 large eggs 

1 teaspoon vanilla extract 

1 ½ cups confectioners’ sugar, sifted 

3 tablespoons buttermilk 

Preheat oven to 350F. Grease 2 (6-cavity) doughnut pans and fit a large pastry bag with a half-inch round tip. Set aside. 

In a large bowl, add flour, salt, baking powder, baking soda and spices; stir together and set aside. 

In a medium bowl, add sugar, oil, pumpkin puree, eggs and vanilla; whisk to combine. 

Add the wet mixture to the dry and fold into a smooth batter using a silicone spatula. Transfer batter to prepared pastry bag and fill each doughnut cavity halfway with batter. 

Bake until the doughnuts spring back when lightly touched, 10 to 12 minutes. Remove from the oven and invert doughnuts onto a wire rack placed over a rimmed baking sheet. 

Prepare the glaze. In a medium bowl, add confectioners’ sugar and buttermilk; whisk until smooth. 

When the doughnuts are cool, spoon about 2 tablespoons of glaze over the top of each doughnut and allow glaze to set before serving, about 20 minutes. 

Pecan Cheesecake 

Courtesy Brooke Williamson 

holiday dessert recipes

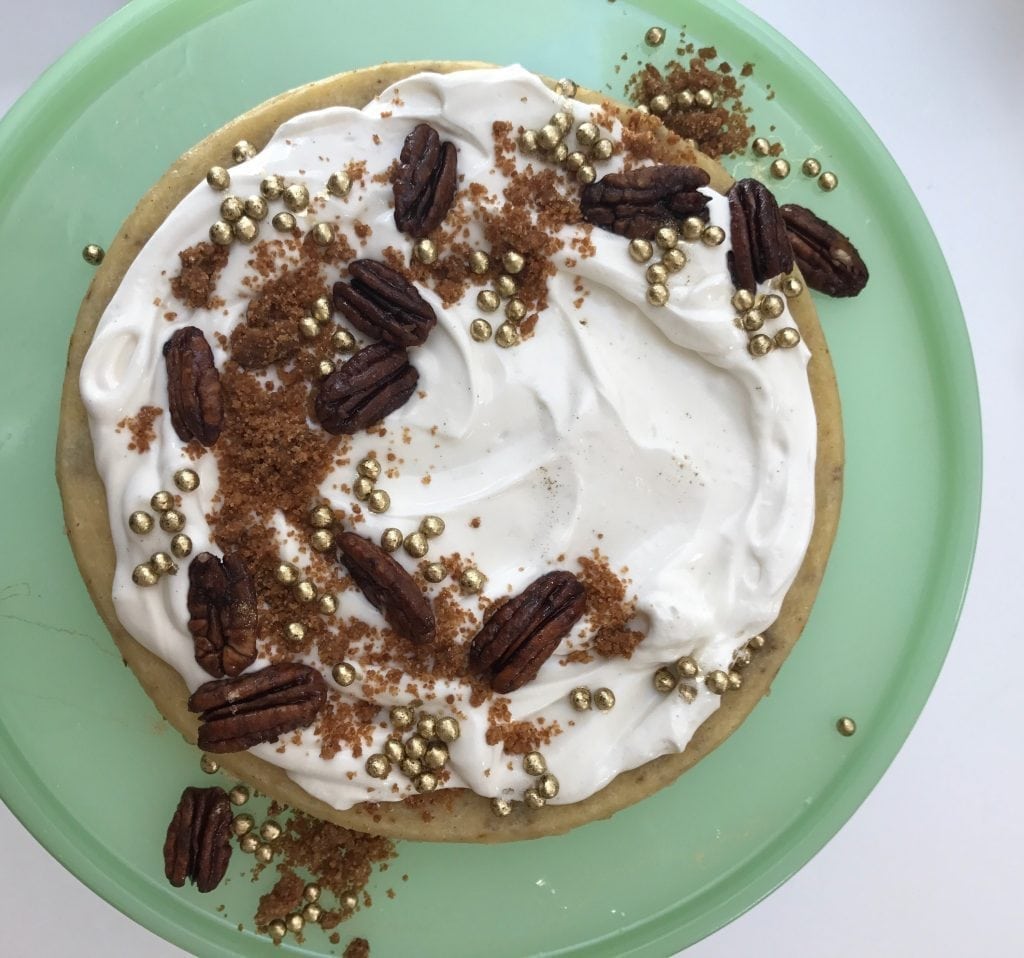
PHOTO COURTESY BROOKE WILLIAMSON

The unusual wrapping and baking process is to keep the cheesecake from cracking as it cools. If it does, you can hide cracks by decorating with whipped crème fraiche, candied pecans and sprinkles. Williamson says you can also substitute other types of nuts – or even crunchy cookies – for the pecans.

Yield: One 9-by-2-inch cheesecake 

4 ounces graham cracker crumbs 

9½ ounces sugar, divided 

1½ ounces melted butter 

2 6-ounce packages cream cheese, softened 

3 eggs 

1½ teaspoons vanilla 

1½ teaspoons lemon juice 

1¼ ounce cornstarch 

½ teaspoon salt 

5 ounces crème fraiche or sour cream 

2 ounces finely chopped toasted pecans 

Preheat the oven to 300F. Combine graham cracker crumbs, ½ ounce sugar and butter in a bowl. Press into the bottom of a greased 9-inch springform pan. Bake at 300°F for 5 minutes. Set aside. 

Whisk together the remaining 9 ounces sugar, cornstarch and salt and set aside. 

Using a stand mixer fitted with the paddle attachment, beat the cream cheese on medium speed to soften and smooth out. Add the dry ingredients and beat on medium speed to combine, scraping bowl frequently. 

Beat in the vanilla and lemon on low speed.  With the mixer running on medium speed, beat in the eggs a few at a time, scraping the bowl frequently. 

On low speed, beat in the crème fraiche and pecans until combined. Pour the batter onto the prepared crust.  Wrap the entire pan tightly in aluminum foil, covering the top, bottom and sides. 

Place the cheesecake in a large roasting pan, place in the preheated oven, and fill with hot water to halfway up the side of the pan. Bake in the water bath at 300°F until the cheesecake jiggles firmly at the center, about 60 minutes. 

Turn off the oven, prop open the door and let the cheesecake cool inside for one hour.  Let cool completely at room temperature, then chill thoroughly before removing springform and cutting and serving. 

Spiced “Pumpkin” Fritters with Chocolate Sauce and Candied Pepitas 

Courtesy Suzanne Goin 

holiday dessert recipes

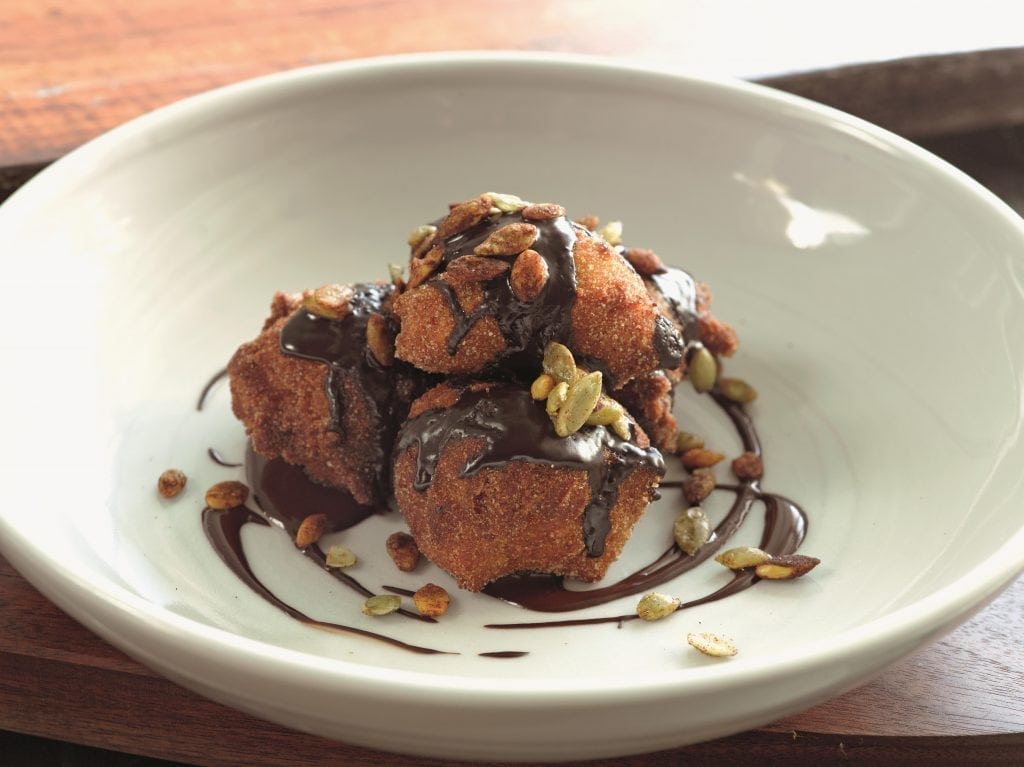
PHOTO COURTESY SUZANNE GOIN

The chocolate sauce can be made and the squash roasted three to four days ahead, and the pepitas and fritter batter a day ahead. If you make the batter ahead, refrigerate it before allowing it to rise, then remove from the fridge and proceed with the recipe from there. 

Makes about 20 fritters 

NOTE: While the fritter batter rises, prepare the chocolate sauce and fried pepitas. 

½  kabocha or butternut squash, about 1 pound 

¼ cup whole milk 

2 teaspoons dry yeast 

3 cups all-purpose flour 

1 teaspoon kosher salt 

1½ teaspoons ground cinnamon 

½ teaspoon ground ginger 

¼ teaspoon ground cardamom 

⅛ teaspoon freshly grated nutmeg 

⅛ teaspoon ground cloves 

4 tablespoons (½ stick) unsalted butter, melted, plus a little for the bowl 

1 extra-large egg 

⅔ cup dark-brown sugar 

½ teaspoon pure vanilla extract 

1 cup granulated sugar 

2 to 3 quarts vegetable oil, for frying 

1 recipe Chocolate Sauce (recipe follows) 

1 recipe Candied Pepitas (recipe follows) 

Preheat the oven to 400F. 

Cut the squash in half lengthwise and place on a baking sheet, cut side up. (Don’t remove the seeds yet; they give extra flavor.) Cover with foil and roast for about 1 hour, until very tender. Let cool for 10 minutes, then scoop out the seeds and discard them. Purée the warm squash through a ricer or food mill and measure out ½ cup. In a large bowl, heat ¼ cup water and the milk to body temperature. Sprinkle yeast evenly across the surface and allow the yeast to bloom for 10 to 15 minutes. 

Whisk the flour, salt, ½ teaspoon cinnamon and the other spices together, then sprinkle across bloomed yeast. Make a well in the center and set aside. 

Combine the squash purée, butter, egg, brown sugar and vanilla, then pour into the well of the dry ingredients. Fold together with a rubber spatula until incorporated; be careful not to over-mix the batter, or the fritters will be tough. (Some specks of flour are OK.) Lightly brush a large bowl with melted butter. Scrape batter into the bowl and flip the batter upside down, so that all sides are covered with a little of the melted butter.  

Cover with plastic and allow the batter to rise in a warm, draft-free place for about 1 hour, until doubled in size. Let the batter rest for at least 1 hour more in the refrigerator, and then bring it to room temperature when you are ready to fry. (Chilling the batter in the fridge develops the flavor and creates more tender fritters.) Combine 1 cup granulated sugar with the remaining 1 teaspoon cinnamon in a large bowl and set aside. Heat the oil to 350F on a deep-frying thermometer, over medium heat, in a heavy, wide-bottomed pan. 

Scoop heaping tablespoons of batter, and use a second spoon to push rounded spoonfuls into the hot oil. Don’t overcrowd the pan; the fritters shouldn’t touch each other. Fry for 2 to 3 minutes, until deep golden brown on all sides. 

Drain the fritters on paper towels and pat to remove any excess oil. While they’re still hot, toss fritters in the bowl with cinnamon-sugar mixture. Pile the fritters up on a platter or divide among six dessert plates. Drizzle with ¾ cup chocolate sauce, sprinkle with candied pepitas and serve remaining chocolate sauce on the side for dipping. 

Chocolate Sauce 

Makes about 1 cup 

3 ounces 68% dark chocolate 

3 tablespoons sugar 

¼ cup good-quality unsweetened cocoa powder 

Chop the chocolate into small chunks and place in a large bowl. 

In a saucepan, combine the sugar with 2/3 cup water and bring to a boil. Add the cocoa powder to the boiling water and whisk to combine. Bring to a boil again, whisking constantly, then immediately pour the water over the chopped chocolate and let sit for 1 minute to melt the chocolate. Whisk together until combined, working from the inside out, to emulsify the mixture. Cool to room temperature. 

Candied Pepitas 

¼ teaspoon cumin seeds 

2 teaspoons unsalted butter 

½ cup raw pumpkin seeds 

1 tablespoon sugar 

Generous pinch each of kosher salt, ground cinnamon, freshly grated nutmeg and ground cloves 

1 teaspoon honey 

Toast the cumin seeds in a small pan over medium heat for 2 to 3 minutes, until the seeds release their aroma and are lightly browned. Pound them coarsely in a mortar. 

Melt the butter in the cumin pan over medium heat. Add the pumpkin seeds and sugar, then sprinkle the salt and spices over them. Toss the pumpkin seeds to coat them well with the butter. Cook for a few minutes, until just after they begin to pop and color slightly. 

Turn off the heat and wait for 30 seconds. Add the honey, tossing well to coat the pumpkin seeds. Spread on a plate, and let them cool. 

Excerpted fromthe a.o.c. cookbookby Suzanne Goin. Copyright 2013 by Suzanne Goin. Excerpted by permission of Knopf, a division of Random House LLC. All rights reserved. No part of this excerpt may be reproduced or reprinted without permission in writing from the publisher. 

Our favorite thing about the holidays isn’t the gifts or the time off work, but the precious memories we make during this extra special time of year. These homemade holiday ideas will give you the perfect excuse to gather around the fireplace and make a meaningful impression that will last longer than the snow. 


Photo credit: Gretchen Miller

Growing Gratitude Tree

Take some time to think about what you cherish with your family and this Thanksgiving-inspired gratitude tree. You can make it as stylish or simplistic as you want; either way it’s sure to spark a meaningful conversation around the dinner table. This easy DIY craft is perfect for little ones to help out with, and they’ll love showing off their creations to friends and family.

What you’ll need:
  • A tree branch
  • Colored construction paper
  • Scissors
  • Markers/Pens/Crayons
  • A vase
  • Tape, string, or glue
  • Sand or pebbles (to keep the branches upright)

Step 1: Find a tree branch (or branches) that are dried out and sturdy

Step 2: Arrange the branches to your liking

Step 3: Fill your vase or container with sand or pebbles to keep the branches in place

Step 4: Cut out some leaf shapes with construction paper

Step 5: Gather around the family and write a couple things you are grateful for. It can be as big as spending some quality time together, or as little as always having enough cookies on hand. If your kids are a little too young to grasp the concept, showcase their drawings or their budding handwriting skills!

Step 6: Use glue, tape, or string to attach the gratitude leaves to the branches.

Voila, you have your own little growing gratitude tree. Pro tip: paint the branches for white for an added touch of elegance!

Photo credit: Mamacheaps.com

Rainbow Reindeer Grub

If you’re kids just can’t wait for Santa, make your own reindeer food to draw him in! You may already have all the materials at home, you just need a couple of minutes of quality time with the family. This adorable, environmentally friendly idea is the perfect gift for the happy DIY holidays.

What you’ll need:
  • 2 cups of oats (the real kind, not the instant packs)
  • 2 cups of bird seed
  • 2 tablespoons of red edible glitter or sprinkles
  • 2 tablespoons of green edible glitter or sprinkles
  • Sandwich size plastic baggies
  • Adhesive gift tags and pen (for the magical poem)

Step 1: Measure out all the ingredients

Step 2: Mix them all together in one big bowl

Step 3: Separate the holiday goodness into as many bags as you like

Step 4: Write down your own special reindeer poem, or use ours listed below

Come Santa, come Dasher, come Donner and Vixen

Come Cupid, Come Comet, follow Rudolph and Blitzen

Lead Santa to our home and into our kitchen

For cookies, love, and his most merry mission!

Tada! Rest assured little ones, Santa will not be able to pass this one up.

Celebratory Scavenger Hunt

No matter what you’re celebrating this holiday season, nothing screams fun more than a scavenger hunt. Start a new family tradition by hiding a gift and watch your kids decipher the clues. If you’re feeling crafty, create your own riddles, but you can always use ours as inspiration.

What you’ll need:
  • Paper for the clues, can be as simple or crafty as you like.
  • A good spot to hide a gift (dryer, secret shelf, bathtub, etc)
  • A fun gift that will be worth searching for

Step 1: Hide the gift. Make sure it’s not too hard for younger children, and not too easy for the older ones

Step 2: Write the clues. Feeling stuck? Use our ideas!

This first clue will be a treat! Look where you get something to eat… (kitchen)

Looking for a missing link? Why don’t you take a peek in the sink (bathroom)

Outside is really quite chilly. Check the front porch, but don’t be silly! (mailbox)

Rudolph pulls a sleigh, not a car or boat. For the next clue, check your ____ (coat)

Run, run, run to where the laundry’s always done! (dryer)

Step 3: Watch the fun unfold

Photo credit: momwifebusylife.com

Brrr(ird) Pinecone Feeder

Give your local birds a gift this holiday season with the peanut butter and birdseed pinecone feeder. Embrace the magic of the great outdoors with this simple and fun idea for you and your kids. With only seven simple steps and plenty of opportunities to customize your feeder, your family is sure to be the squawk of the town.

What you’ll need:
  • The biggest pinecone you can find
  • String
  • 1/2 cup of peanut butter
  • 1/2 cup of oatmeal or cornmeal (maybe from what’s left over of the Reindeer Grub?)
  • Birdseed mix
  • Plate or tin

Step 1: Tie the string around one end of the pinecone

Step 2: Mix the peanut butter with your oats/cornmeal

Step 3: Warm the mixture up briefly in the microwave or over (makes it easier to spread)

Step 4: Use a spoon or some gooey fingers to spread the mixture over the pinecone. Try to get it in all the little nooks and crannies – the birds will thank you!

Step 5: Pour the birdseed into your plate or tin

Step 6: Roll the sticky pinecone through the birdseed until it is completely covered

Step 7: Hang your pinecone!

Candy Cane Cleaners

Living room looking a little bare this Christmas season? Recreate everyone’s favorite striped candies with this simple, kid-friendly, DIY ornament project.  You only need three items to spruce up your spruce tree, so you’ll have plenty of extra time to make those cookies for Santa.

What you’ll need:
  • 1 package of green pipe cleaners
  • 1 package of red pony beads
  • 1 package of white pony beads

Step 1: Tie a knot at one end of the pipe cleaner

Step 2: String the beads through, rotating between red and white

Step 3: Once full, tie another knot at the other end of the pipe cleaner

Step 4: Bend the tip of the pipe cleaner to a lower case ‘R’ shape, just like a candy cane

Step 5: Decorate the tree with your creations, or give as stocking stuffers to family and friends


This holiday season, give the gift of unlimited outdoor fun with these NAPPA Award winners!

Garden View Cottage

Your kids will love stepping inside this charming Garden View Cottage for hours of imaginative play. Adorable and well-constructed design, rich detailing and an open air style for a full view of playtime happenings. Four corner seats open up the interior space, inviting friends to join in the culinary fun. A play kitchen with pretend oven, stove, and molded-in shelves as well as an outdoor chimney with pretend pizza oven offers more cooking fun. Two window sills offer a place to serve up culinary creations or use the molded-in track to ride around their favorite mini vehicles.$299.99, ages 1 1/2+

RazorX Cruiser Electric Skateboard

The RazorX Cruiser is a skateboard with an electrifying kick, putting the control of the 125-watt, rear-wheel-drive motor in the palm of your hand and under your feet. Get the fun rolling with the variable-speed control on this versatile cruiser, then lean into the lithium-ion-powered, carve-and-turn skate action at speeds up to 10 mph (16 km/h). $179.99, ages 9+

Nighthawk

Master the thrill of the ride with the 12 Volt Nighthawk Ride-On from Rollplay. Reaching forward speeds of up to 6 miles per hour, this innovative ride-on is sure to be a hit with little thrill-seekers. Accelerator and brake pedals allow the rider to control the speed of the Nighthawk with ease. Kids will love learning how to maneuver around obstacles with the unique steering technique — lean left and right to do quick turns. $149.99, ages 6+

Razor Power A2 Electric Scooter

Packed with innovation from its lithium-ion battery and push-button throttle control to its kick-to-start in-hub electric motor, the Power A2 is ushering in a new age of performance in an ultra-modern, compact and easily foldable update of the classic A scooter. Light-weight and streamlined, the Power A2 packs a powered punch with bold style and a rattle-free ride at speeds up to 10 mph (16 km/h) and 40 minutes of continuous use. $199.99, ages 8+


We love getting cozy on the couch with our kids to watch a good movie. That’s why we’re super excited for these recent NAPPA Award-winning DVDs that are fun and educational. They make a great holiday gift.

Sesame Street – Elmo’s World: Elmo Explores!

Explore the everyday world with everybody’s favorite furry red monster, Elmo, in the new DVD release of Sesame Street – Elmo’s World: Elmo Explores!

Elmo Explores! is a two-hour collection of Elmo’s World episodes, appearing for the first time on DVD. Using the power of his imagination, Sesame Street’s little red monster explores kid-friendly topics such as painting, cooking and habitats from a child’s point of view. Joined by the hilarious Mr. Noodle, Smartie the Smartphone, and his pet goldfish Dorothy, Elmo asks questions that lead to fun discoveries. An age-appropriate launch pad for imagination and learning, Elmo’s World: Elmo Explores! indulges children’s natural sense of curiosity about the world around them. $14.98, ages: 2+

Sesame Street: The Magical Wand Chase

Kids will love going on a cultural adventure with Sesame Street: The Magical Want Chase. While taking her friends on a magical hot air balloon ride, Abby Cadabby loses her wand to a curious bird, voiced by Elizabeth Banks. Without Abby’s wand, they can’t get back to Sesame Street. A chase ensues! Pursuing the bird in their hot air balloon, Abby and the gang visit new neighborhoods and discover new foods, music, and languages. Best of all, they make new friends who help them find the missing wand and show them the way back home. Who knew there was so much to discover just around the corner? $14.98, ages 2+

Sgt. Stubby: An American Hero

Sgt. Stubby is a heartwarming, critically acclaimed, animated “tail” that shows the world that the greatest heroes can come from the unlikeliest of places. Based on the incredible true story of the unbreakable bond between a young soldier and a little stray dog on the brink of America’s entry into World War I. $19.99, for the entire family.

Dream Big: Engineering Our World DVD

Get ready to explore our world with the critically acclaimed film Dream Big: Engineering Our World (narrated by Jeff Bridges) released in a 2-DVD set by Shout! Factory. Originally filmed for and seen in IMAX® and Giant Screen theaters, this stunning film is now available in living rooms across the country.

The education-focused 2-DVD edition of Dream Big: Engineering Our World will offer the complete movie along with a 150-page educator’s guide (12 lesson plans, including handouts), 10 educational shorts, 8 behind-the-scenes featurettes and 8 more short “Fun Fact” videos. This set brings the wonder of engineering to life for students everywhere. $19.97, ages 6+

The Boxcar Children – Surprise Island DVD

Small island. Big adventure! The beloved Boxcar Children now on DVD with the release of the new animated feature film THE BOXCAR CHILDREN – SURPRISE ISLAND.

The highly-anticipated movie adaption of the popular children’s book of the same name, stars Martin Sheen (The West Wing), Oscar®-winner J.K. Simmons (Whiplash), Dane DeHaan (Valerian and the City of a Thousand Planets) and many more. THE BOXCAR CHILDREN – SURPRISE ISLAND follows the adventures of the orphaned Boxcar Children as they spend an entire summer living on their Grandfather’s small, nearly uninhabited island. $16.97, for the entire family.

All About Trains Book and DVD Combo

All About Trains is a fun book and DVD combo introduces little railroad fans to the subject of trains and rail transportation. Join Carl the Train Conductor and his animated rail friends as they take a reading and video adventure to learn how trains were invented, how they work, how fast they go, the different kinds of trains, how trains talk to each other, train safety, and more. Loaded with full-color images, 90 pages. DVD is 40 Minutes. $19.95, ages: 5+


Don’t Miss Out On The Fun

Sign up for our ENews and be the first to know the latest on toys & family must-haves, giveaways & gift and play ideas!

No Thanks Let's Connect

Family must-haves, articles & giveaways