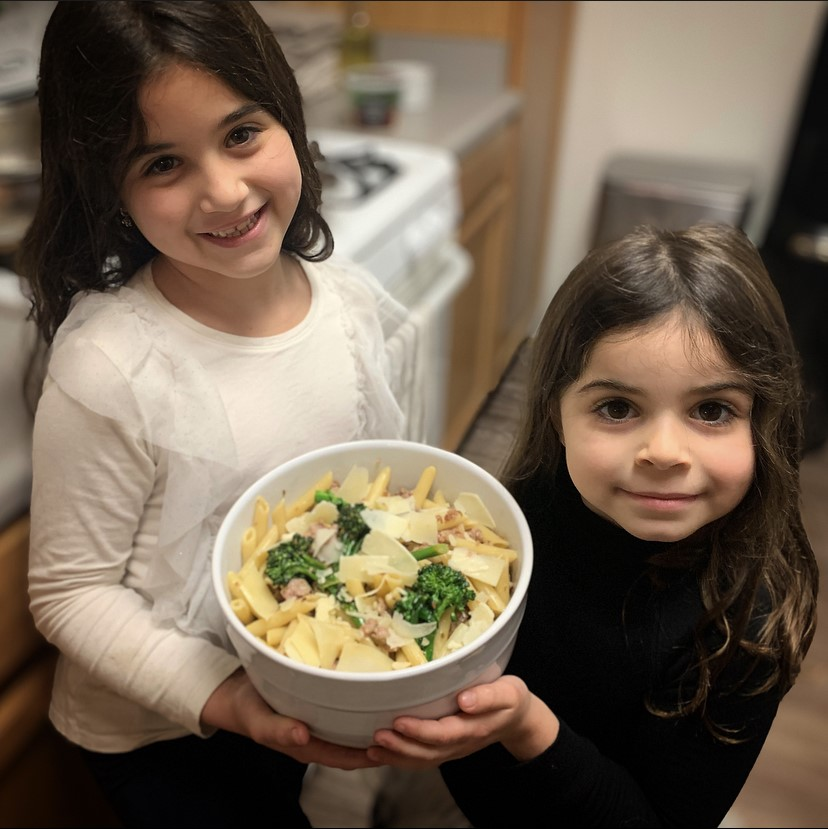
Peter Tulaney’s daughter show off their Penne Pasta with Sausage and Broccoliini. PHOTO COURTESY PETER TULANEY

Want to make cooking with your family easier and more fun? Set yourself up like a restaurant kitchen, says Peter Tulaney, L.A. dad of two and head chef and founder of The WEHO Sausage Co.

Tulaney, who spent 10 years as a child psychologist, started making sausage at home after receiving a Kitchen Aid standing mixer (with sausage attachments) as a gift. He shared his creations with friends and began getting requests to cater parties and other events, creating a side business that stole his heart.

After almost two years, he made the change. “The difference between my daily routine as a clinician and having a party with someone was too much to ignore,” says Tulaney. “So, I decided that I would take a couple years to become a better food person and start to break down my practice.” And that’s just what he did. Tulaney left psychology, leased space in a commercial kitchen in Downtown L.A. and launched WEHO as a full-time catering business.

The company grew, catering events and corporate lunches before the COVID-19 pandemic put an end to business as usual. WEHO went from 15-20 weekly catering deliveries to zero.

Fortunately, Tulaney had other irons in the fire. He had been in talks with Citizen Public Market, the Culver City food hall that opened its doors in November. While the sausage is still processed in the Downtown kitchen, the food served at the market is all made on site. They are open from 11 a.m.-9 p.m. Tuesday through Sunday for takeout. The menu includes sandwiches with hamburger, sausage (pork, chicken and lamb) and veggie patties, fries, salads and charcuterie. There are also dishes for weekend brunch.

With a day’s notice, you can also order packs of uncooked, frozen sausage patties (which Tulaney points out can be broken up and used loose) for pickup at Citizen Public Market or the WEHO facility Downtown. It’s exactly what you’d use in this recipe, which Tulaney says harkens back to his childhood. “I’m from Bay Ridge Brooklyn, and my mom cooked every single meal that I ate growing up,” he says. “This is just the style of food we ate.” Everyone loves pasta and the dish is inexpensive and quick to make. “The whole thing, start to finish, takes place in less than 20 minutes and that includes boiling water,” says Tulaney.

As a chef, former child psychologist and father to daughters ages 5 and 7, Tulaney says cooking with kids can be fun for all if it’s well organized. “The way a commercial kitchen operates is not hard to reproduce if you’re doing it with your family,” he says, explaining that restaurant kitchens have an executive chef, some support chefs and some prep chefs. “Those jobs are broken down into levels of responsibility and technique and understanding, and you can do the exact same things with your kids if you choose age-appropriate tasks for them to do. My little one can crack eggs, and my older one is able to use a measuring cup.”

He has written this recipe to take advantage of this division of labor.

It’s also pretty flexible. “If you don’t like broccolini or broccoli rabe, you can use florets or you can use cauliflower or you could use cherry tomatoes or you could use red onion,” Tulaney says. Just put a pot of water on the stove and follow the rest of the instructions while it comes to a boil and the pasta cooks, and you’ll have dinner within half an hour.

Chef Peter Tulaney

Penne Pasta with Sausage and Broccolini from WEHO Sausage Co.

Serves 4

4 cups dried penne pasta

Sea salt

2 tablespoons olive oil

12 ounces loose Italian pork sausage (preferably from WEHO Sausage Co.)

1 bunch broccolini, washed and trimmed

4 cloves garlic

1 lemon, cut in half

Freshly grated Parmesan cheese for serving

Adults: Bring 4 quarts of water to a boil in a large stock pot and add a handy pinch of salt. Start this first – the trick is to finish everything else while the water is coming to a boil.

Kids: Measure out 4 cups of dry penne pasta and put it off to the side, so it is ready when the water is boiling.

Adults: Heat the olive oil in a large sauté pan (the largest one you have, as it will have to hold everything). Add the ground sausage. With a wooden spoon, break up sausage into small pieces and stir until nice and brown, about 3 to 4 minutes.

Kids: Break open a head of garlic and chose the 4 biggest cloves. The bold may even attempt to peel the garlic, discarding any skins.

Adults: When the sausage is brown, transfer it to a bowl, keeping as much of the oil (and flavor from the sausage) as possible in the pan. We will not be adding any more.

Kids: With adult supervision, add the garlic cloves to the oil in the pan. (If you like garlic a lot, an adult can chop the garlic first.) Move the garlic around with the wooden spoon until some color forms on the garlic, then drop in all of the broccolini. Add a tiny pinch of salt (since the oil is already flavored with the sausage). Carefully squeeze every last drop of juice from the lemon right on top of the broccolini and cover the pan.

Adults and kids: By this time the water should be boiling. Add the dried pasta to the water. Stir the broccolini a bit.

Adults: Add the browned sausage back into the sauté pan. Strain the pasta, reserving very little water in the pasta pot. Add the strained pasta directly into the sauté pan and stir.

Serve with the Parmesan cheese.
Cupcake Recipe from Raddish Kids

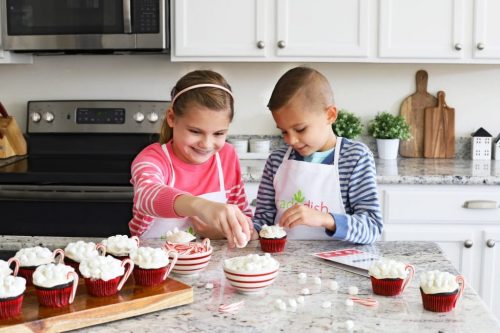
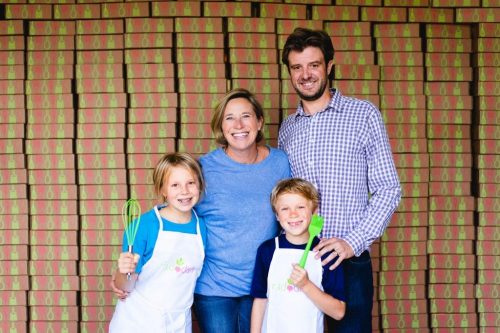
Raddish Kids founder Samantha Barnes with her family. Photo Courtesy of Raddish kids

Samantha Barnes used to teach cooking classes to kids all over L.A., offering after-school enrichment programs, summer camps and weekend parties through her company Kitchen Kid. Years before the coronavirus pandemic, she decided to bring her lessons into home kitchens instead. “Really, the most important place to learn to cook is your home, and it’s a really powerful activity for families to do together,” Barnes says. Seven years ago, she created Raddish Kids, a cooking club that ships monthly kits and recipes to families across the country.

Barnes is a former middle-school teacher with a 10½-year-old daughter (a vegetarian and baking enthusiast) and an 8½-year-old son (lover of sloppy Joes and banana bread), so she’s got some great tips for bringing kids into the kitchen. Her first is not to try to hurry your cooking projects. “Make sure you have enough time,” she says. “Cooking takes time, and when you’re baking it takes even longer.”

Another great tip is to let kids practice essential skills before you tackle a recipe. “It took me years before I’d let my kids measure into muffin cups, because half the batter would be in between the cups,” admits Barnes, whose kids help her test Raddish recipes. She suggests filling a liquid measuring cup with water and letting your kids get a feel for pouring with that before you tackle this cupcake recipe. “Once you get that skill, you can do cupcakes and muffins and all sorts of things,” she says. You can also let your kids put on oven mitts and practice moving pans in and out of a cold oven to give them confidence.

To keep kitchen mess to a minimum, put a sheet of wax paper over your counter before the kids measure ingredients. Wrap up with a big sink full of soapy water and let your kids scrub the dishes.

For families that might be missing some of their usual holiday traditions this season, Barnes recommends creating a new food tradition. “Food is so inextricably linked with memory, that’s a great way for kids to develop their own personal food story for when they are older and have their own family,” she says. Barnes will be enjoying the usual Christmas Eve raclette (similar to a fondue), Christmas Day posole and New Year’s Eve “fancy food” hors d’oeuvres with her family. Maybe your kids would like baking these adorable cupcakes. “When they are put together,” she says, “it really does look like a cute little mug of hot cocoa.”

Cupcake Recipe from Raddish Kids

Hot Cocoa Cupcakes from Raddish Kids

For the cupcakes

¾ cup flour

½ cup cocoa powder

¾ teaspoon baking powder

¾ teaspoon baking soda

½ teaspoon salt

1 egg

1 cup sugar

¼ cup canola oil

1 cup milk

1 teaspoon vanilla extract

For the topping

¾ cup butter, softened

½ cup powdered sugar

1 teaspoon vanilla extract

7-ounce jar marshmallow fluff

2 tablespoons milk

12 mini candy canes

¾ cup mini marshmallows

Preheat the oven to 350 degrees. Line a muffin tin with paper liners or spray with nonstick cooking spray.

In a medium bowl, whisk together the flour, cocoa powder, baking powder, baking soda and salt.

Crack the egg into a large bowl. Throw away the shells and wash your hands.

Add the sugar, oil, milk and 1 teaspoon of vanilla extract to the egg. Whisk until combined.

Add the flour mixture to the egg mixture. Whisk until smooth.

Transfer the batter to a liquid measuring cup and fill the muffin cups evenly with batter.

Bake the cupcakes for 17-20 minutes, until a toothpick inserted in the center comes out clean. Let the cupcakes cool 10 minutes.

Meanwhile, make marshmallow frosting. With an electric hand mixer or in the bowl of a stand mixer, beat the butter, powdered sugar and 1 teaspoon of vanilla until creamy.

Add the full jar of marshmallow fluff and 2 tablespoons of milk. Beat the frosting until it is smooth.

Use a butter knife to spread frosting on top of each cupcake.

Top the frosted cupcakes with mini marshmallows.

Set one candy cane on the side of each cupcake to create a “handle.” Taste and share!

It’s probably been a while since you actually sent your kids off (as in out of the house) to school. All signs indicate that it could be a while longer until you do, but any school day, even a day of distance learning, should start with the right breakfast fuel.

In 2015, Catherine McCord realized that wasn’t happening at her house. That’s a surprise, since she is the mom behind Weelicious, a website devoted to simple and healthy recipes for the whole family. Her son, the oldest of her three kids, was experiencing unexplained headaches, nausea and fatigue. McCord eventually identified breakfast as the culprit. The family was eating a super-healthy diet the rest of the day, but in the morning, she was letting the kids have the pancakes, waffles and toast they requested.

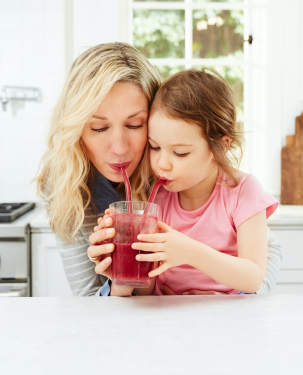
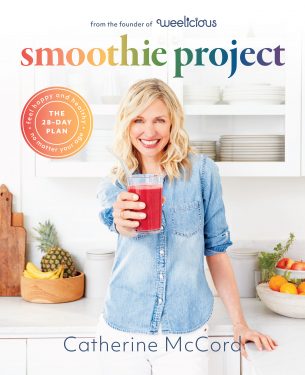
She realized that these foods weren’t giving her son what he needed to start his day. Smoothies became the family’s new breakfast, her son’s health problems disappeared and McCord wrote “The Smoothie Project,” a cookbook with almost 100 smoothie recipes to fuel healthy eating.

“The idea is that all the smoothies have fruit and vegetable and protein, and that they’re keeping you full and energized,” says McCord. “Having a smoothie a day means you’re replacing a meal that might not be as good for you.”

To get your family in the smoothie-a-day habit, McCord’s book proposes a 28-day plan: Have a smoothie for one meal a day for 28 days and you’ll notice a difference in your body, she says. “Then you have two paths. You can have mac and cheese or chocolate ice cream later in the day and feel less guilty because you know you had a good meal already, or you can feel so good that you want to keep the feeling going, and you’ll make better choices,” says McCord.

The book has smoothies to suit every flavor preference, including coffee- and chocolate-based smoothies, tropical, berry heavy and seasonal options. There are also chapters to help simplify smoothie making, a bit about blenders, nutritional information and a thorough guide to the types of “super boost” ingredients you’ll find in the supplement aisle at Gelson’s. “There’s something for everyone, depending on your flavor preference and what you’re trying to get done in your body,” says McCord.

Through the online community McCord built using #smoothieproject, she has heard how smoothies have helped parents with picky eaters, parents trying to minimize their kids’ processed-food intake, people trying to lose weight and even senior citizens. One Potato, McCord’s family meal-subscription service, recently added smoothie kits to its menu of options.

Want a taste of what it’s all about? All you need is a blender (a high-powered one, if possible, and McCord suggests borrowing a friend’s rather than buying one if you’re just getting started).

A great gateway is this Blueberry Cherry Lemon smoothie, which McCord says is an “antioxidant bomb” with tons of nutrition and flavor.

Blueberry Cherry Lemon Smoothie from ‘The Smoothie Project’

Serves one

¾ cup (111 grams) frozen blueberries

¼ cup (38 grams) frozen cherries, pitted

¼ lemon (with peel and pith), seeds removed

2 tablespoons coconut yogurt

1⁄8 teaspoon ground cardamom

1 tablespoon hemp seeds

1 tablespoon honey or blue agave

¾ cup (180 milliliters) almond milk or milk of choice

Combine all the ingredients in a blender and blend until smooth. Enjoy!

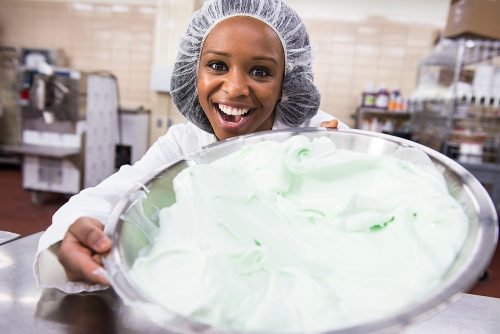
Ice cream scientist Maya Warren. Photo by Jeff Miller/UW-Madison

Maya Warren has a job title that would get most kids’ attention. She’s an ice cream scientist. Translation: Warren is senior director of international research and development/tastemaster at Cold Stone Creamery, and has a doctorate in food science from the University of Wisconsin-Madison, specializing in frozen desserts. After being introduced to food science through the Food Network show “Unwrapped,” she decided to combine her passions for ice cream and chemistry to create a career that lets her do what she loves every day.

While her favorite ice cream flavor fluctuates between cookies and cream and a double-buttered candied pecan that is her own creation, the L.A.-based flavor maker finds inspiration for new flavors everywhere. “Whether it is at a fine dining restaurant, the candy or yogurt aisle at the grocery store or just following up-and-coming food trends across the globe, creativity is always around us,” Warren says. “It is really fun to push the envelope with ice cream flavors.”

Honey, cornbread and blackberry jam? Thai curry, peanuts and lime? Why not! “The flavors you can make are totally endless!” Warren says. “Now, not everything will taste amazing, but you never know when you might develop an amazing flavor that will leave people wanting more.”

What does she eat when she isn’t eating ice cream? “I love a great plate of veggies,” Warren insists. “I pretty much add spinach and broccoli to anything and everything … except ice cream. I’ve definitely not tried spinach or broccoli ice cream!”

The recipe this ice cream scientist has shared is the no-churn variety, which means you can make it without an ice cream maker. She says both varieties are very tasty, and that the main difference is in the process. No-churn recipes involve whipping the cream separately to create foam and give the mixture lightness, which wouldn’t be efficient for large-scale production. Ice cream that is churned freezes a prepared mixture and uses the machine to incorporate air during the freezing process.

Using this no-churn recipe, you create the base, then let your creativity loose to create your own flavor combinations. “Layer in whatever your creative mind and taste buds desire!” says Warren. Want more inspiration? Follow the ice cream scientist on Instagram, where she hosts live “Ice Cream Sundays with Dr. Maya,” demonstrating her recipes so that families can follow along.

The No-Churn Ice Cream Recipe:

2 cups (1 pint) heavy whipping cream, chilled

1¼ cups of sweetened condensed milk (approximately one 14-ounce can)

¼ cup evaporated milk

2 teaspoons vanilla extract

Inclusions of your choice – broken/chopped cookies, sprinkles, caramel and/or fudge sauce, etc.

In a large mixing bowl, combine the sweetened condensed milk, evaporated milk and vanilla extract.Gently mix with a spatula until homogeneous, then set aside.

Pour the heavy whipping cream into a smaller mixing bowl. Starting on the lowest speed to avoid splashing, then gradually increasing to the highest speed, whip with a hand or standing mixer until whipped cream forms stiff peaks, about 3-5 minutes. Be careful not to over-whip the cream or it will turn into butter.

Using a spatula, scoop and gently fold the whipped cream into the sweetened condensed milk mixture until all of the cream is folded in. This now becomes your ice cream base – set aside.

Grab your storage container and a ladle. Using the ladle, scoop a layer of ice cream base into the container. Spread a layer of inclusions on top. Add another layer of ice cream base, followed by another layer of inclusions, and alternate until all of your ice cream base and inclusions are in your container.

Place a lid, plastic wrap or parchment paper over your ice cream. If using parchment paper or plastic wrap, gently press down until it lightly touches the ice cream. Freeze for 5-6 hours or overnight. Remove the container from the freezer and let it sit on the counter for 5-7 minutes if the ice cream is too hard to scoop. Enjoy!

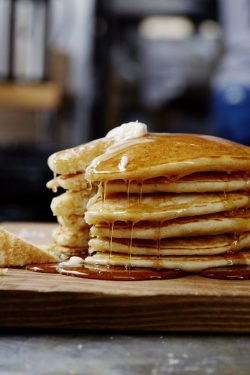
Zoe Nathan, part of the team behind the Rustic Canyon family of restaurants and author of “Huckleberry: Stories, Secrets, and Recipes From our Kitchen,” got this recipe from her dad. “My father used to make these almost every weekend when I was growing up, and then he proudly made them every weekend for Saturday Morning Breakfast at Rustic Canyon, she writes in her cookbook.

We think this makes them perfect for your Mother’s Day menu – or any day. Dads, you can do it!

Nathan does have one piece of advice about perfecting this simple recipe. “If these pancakes aren’t done on a super-hot griddle and they don’t get that deep brown color,” she says, “they become an entirely different, sadder animal. So please, cook these properly and make my Dad proud.”

Photo by Matt Armendariz

‘My Dad’s Pancakes’ from Rustic Canyon

Makes about 12 pancakes

1 vanilla bean or 1 tablespoon vanilla extract

2 cups whole milk

2 cups/250 grams all-purpose flour

1 tablespoon baking powder

4 teaspoons sugar

1 teaspoon kosher salt

1 cup unsalted butter, melted

4 eggs, separated

If using the vanilla bean, split lengthwise, scrape the seeds into the milk, and toss the pod in, too. Bring to a boil, whisking occasionally to help break up the vanilla bean. Allow to cool or refrigerate overnight. Discard the pod before using.

Place the flour, baking powder, sugar, and salt in a large bowl. Add the butter, egg yolks and vanilla milk (or milk and vanilla extract). Whisk to combine.

In a separate bowl, whip the egg whites to soft peaks with an electric beater on medium-high speed, 3 to 4 minutes. Fold the whites into the batter.

About 5 minutes before you’re ready to make the pancakes, preheat a greased griddle or large skillet over medium-high heat; the griddle is ready when a few droplets of water sizzle and dance across the surface.

Drop . ½ cup of batter onto the hot griddle. When bubbles set on the surface of the pancake and the bottom is golden, flip and cook about 1 minute longer. Serve immediately, while hot, with butter and maple syrup or yogurt and fruit.

These are best the moment they leave the griddle.

The Rustic Canyon Family restaurants include Rustic Canyon, which is temporarily closed, and its sister restaurants Huckleberry, Sweet Rose Creamery, Milo + Olive, Cassia, Esters Wine Shop and Bar, Tallula’s, Milo SRO and Birdie G’s. All of the restaurants except Rustic Canyon are offering curbside pickup, takeout and delivery. You can also support the restaurants by purchasing gift cards used to dine at a later date.

One fun side-effect of being at home is that everyone has lots more time to make – and eat – breakfast. This French toast recipe from La Brea Bakery makes use of their wonderful baguette (in case you didn’t finish it off with dinner) and doesn’t require any special equipment or technique. You can put the whole thing together the night before, then quickly finish it up in the morning to kick-start everyone’s day.

La Brea Bakery Oven Puffed French Toast

1 La Brea Bakery baguette (unsliced)

10 eggs

½ cup all-purpose flour

6 tablespoons sugar

½ teaspoon baking powder

2 teaspoons vanilla extract

1 cup milk

1 cup dark beer

Pinch of coarse salt

8 tablespoons unsalted butter

Cut the bread diagonally into ¾-inch slices and place in a dish in a single layer. Whisk together the eggs, flour, sugar, baking powder, vanilla, milk, beer and salt. Pour over both sides of the bread. Cover and refrigerate overnight, or for at least one hour.

Preheat oven to 350 degrees. In a very large ovenproof skillet, melt the butter. Add the soaked bread, and brown on one side. Turn the bread over and place the skillet in the oven for 10-12 minutes, until the toast is puffed and golden brown on the bottom.

For Los Angeles residents, fresh-baked artisan breads and pastries are available for 25% off for pick-up at the La Brea Bakery Café on South La Brea. The café’s full menu for breakfast, lunch and dinner is available for pick-up, and also through Grubhub, Postmates, UberEats and DoorDash. In addition, health care workers, first responders and essential front-line employees can receive a free boxed meal that includes a sandwich, chips and a cookie when they present their badge or proof of employment at the South La Brea café.

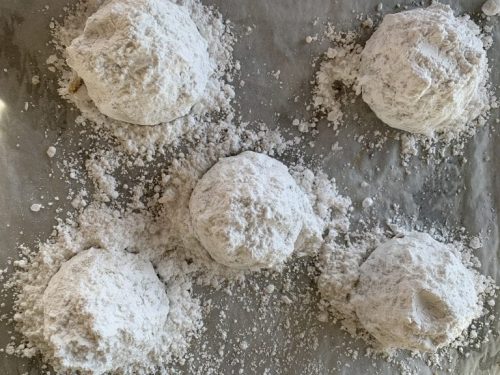
Chocolate Peppermint Snowball Cookies Recipe from Little Flower

Yields 15 cookies

1 cup (228 grams) butter
1 cup + 1 tablespoon (120 grams) powdered sugar
1 teaspoon vanilla extract
1½ teaspoons peppermint flavor
2½ cups + 1 tablespoon
(310 grams) all-purpose flour
¾ teaspoon salt
¾ cup (175 grams) mini chocolate chips
1 cup (115 grams) powdered sugar, to coat cookies

Place the butter in a medium or large saucepan over medium-high heat. Heat the butter until it foams and milk solids fall to the bottom of the pot. Use a rubber spatula to scrape the bottom so that the milk solids brown evenly without burning. Let the butter foam a second time. Butter should have a nutty aroma. Remove from heat and cool. Once cooled, transfer into a clean, scent-free container and refrigerate until ready to use.

In the mixing bowl of a standing mixer with the paddle attachment, combine the browned butter and powdered sugar on medium-low speed for 30 seconds. Use a rubber spatula to scrape the bowl. Add the vanilla extract and peppermint flavor and mix on low speed for 30 seconds. Scrape the bowl well. Add the flour and salt and mix on low speed until just incorporated, about 20 seconds. Add the mini chocolate chips and mix on low speed until just combined, about 10 seconds. Scrape the bowl well and finish incorporating the dry ingredients with the rubber spatula.
Portion the dough into 2-inch balls or use a #20 yellow scoop and place them on a sheet pan lined with parchment paper. Freeze until firm, at least 1 hour. Frozen cookie dough will keep in an airtight container for up to 2 weeks.

Preheat the oven to 375 degrees Fahrenheit. Place the cookies on a parchment-lined sheet pan with at least a 1-inch space between each cookie. Bake for 8 minutes, then rotate the pan. The dough will have puffed a bit. Bake 7 more minutes, or until the edges are golden and small cracks appear. Allow to cool for 5 minutes. Coat warm cookies with powdered sugar.

A Sweet Southern Treat

Catarah Coleman, left, and Shoneji Robison Photo Courtesy: SOUTHERN GIRL DESSERTS

Our favorite foods often make us think of “home,” especially near the holidays. Catarah Coleman and Shoneji Robison both grew up in Florida. After moving to L.A., Coleman founded Southern Girl Desserts, head-quartered in Baldwin Hills, and was soon joined by Coleman. The two brought their childhood with them.

In their homes, “Thanksgiving is a smorgasbord of desserts,” Coleman says. This means overflowing tables of cakes, trifle, banana pudding, ambrosia – and sweet potato pie. These southern girls, like most southerners, have their own take on this classic. “Everyone does their sweet potato pie a little different,” Coleman says. “If you like sweet potato pie, you’re going to love this recipe. It’s really easy to make. It doesn’t take a lot of ingredients.”

Coleman recommends using foil to protect the edge of your pie crust when par baking, and says the crust shouldn’t be cooked all the way through and should still be warm when you fill it.

The sweet potatoes or yams (they can be used interchangeably) are boiled whole because it’s easier than peeling them first. “Once the yams are soft and have boiled all the way through, the skin literally peels off,” Coleman says. “That’s the best way to get your yams cooked and peeled really quickly.” Finish the pie while the yams are still warm so all the ingredients come together easily.

The finished pie will hold at room temperature for a day, 3-4 days cooled and refrigerated or 8-10 weeks frozen (well wrapped).

Southern Girl Desserts Sweet Potato Pie

  • 4 medium size yams or sweet potatoes 1 stick butter, melted
  • 1¼ cup granulated sugar
  • 1 cup brown sugar
  • 2 teaspoons cinnamon
  • 2 teaspoons pure vanilla extract
  • 2 teaspoons lemon juice
  • 3 medium eggs
  • 1 9-inch pie crust, your favorite recipe or ready made

Preheat oven to 350 degrees. Fit your crust into a pie pan and par bake no more than 10 minutes, or according to package instructions.

Boil the yams or sweet potatoes (unpeeled) until soft (usually 30-45 minutes). When cool enough to handle, peel them. Whisk the yams together with the butter, sugar, brown sugar, 1 teaspoon cinnamon, vanilla and lemon juice.

Add three cups of this mixture to a separate bowl or the bowl of a stand mixer. Add 2 eggs and mix until smooth (approximately 3-5 minutes). Remove any stringy pieces of yam from the mixture and discard.

Beat the remaining egg with 2 teaspoons of water. Brush this over the par-baked crust. Mix 1 teaspoon of cinnamon with the remaining ¼ cup of sugar and sprinkle this over the crust. Pour in the filling.

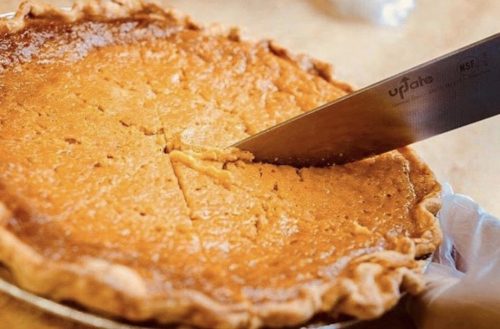
Bake the pie at 350 degrees for one hour. Allow to cool for one hour, then cut and serve.


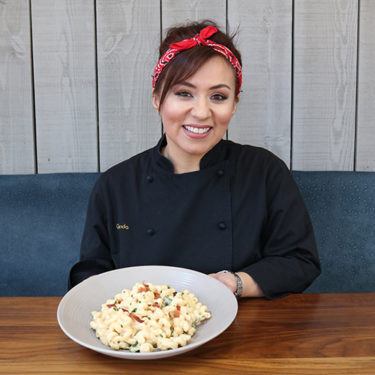
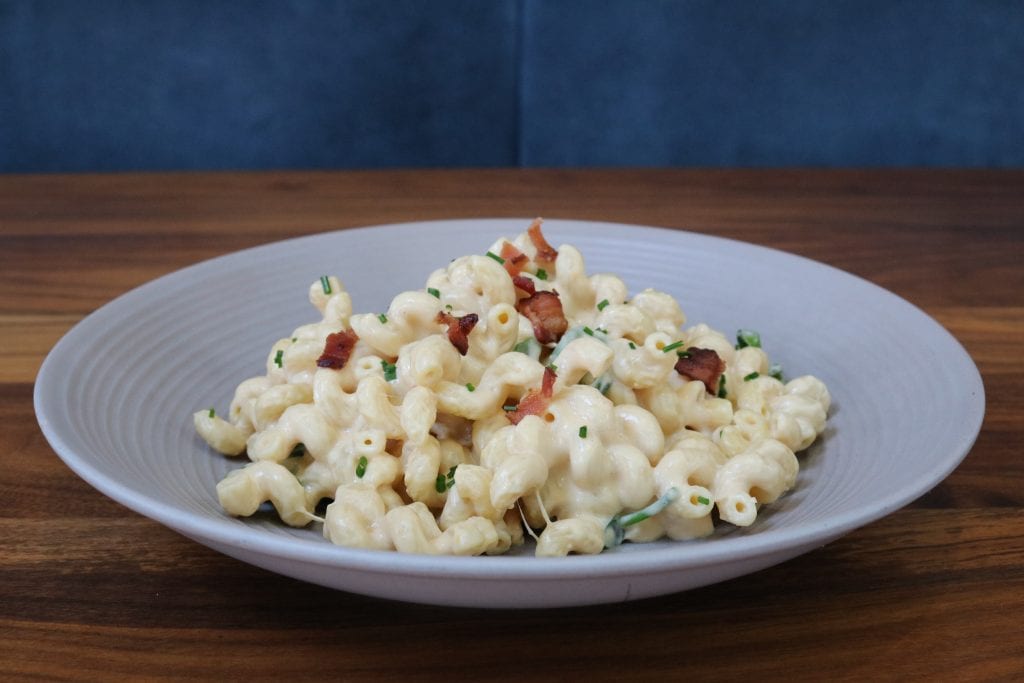
Faced with a toddler who was a picky eater, Glenda Galvan-Garcia resorted to something that has worked for many parents: sneaking vegetables into his food by disguising them among the other ingredients. It worked for a while, until Isaac was about 3. Taking a bite of the macaroni and cheese into which Galvan-Garcia had mixed pureed garbanzo beans, he turned to her and said, “Mom, you made sneaky mac and cheese!”

“I was busted, and for years after that, he didn’t really trust my cooking because he thought I was going to sneak something in there,” she says. Isaac, now 8, has recovered some of his trust but is still a little picky. However, he loves this mac and cheese recipe in which Galvan-Garcia promises the squash is undetectable.

Galvan-Garcia is executive chef and co-creator of Granville, with locations in Glendale, Burbank, Studio City and West Hollywood (opening soon in Pasadena). The dish is based on the local chain’s popular Uptown Mac & Cheese. “I wanted to create a dish that didn’t require a roux, that could be done while you’re away at work and that has extra vegetables,” she says. “It’s approachable for the novice in the kitchen, it’s upscale enough for the foodie and it’s delicious enough for the picky eater.”

That’s partly because the recipe requires no fussy browning of flour and butter, but instead comes together with a blender. You can put everything into the slow cooker in the morning, then just puree the sauce, boil the pasta and veggies and add your protein when you’re ready to eat. You could also simmer the sauce ingredients in a pot on the stovetop until the squash is fork tender.

The ingredients are flexible. Galvan-Garcia says the smoked Gruyere works well with bacon or other meat, but might overwhelm a vegetarian version of the recipe, so it’s OK to use plain Swiss cheese if you prefer. You can use any shape of pasta you like, even egg noodles. And you can add any cooked vegetable your child likes (at Granville, they add peas peas and asparagus). If you like a cheesy, crumbly topping, add some shredded cheese and bread crumbs and pop the dish into the oven.

You can also get your kids into the act, something Galvan-Garcia encourages. “You look at some generations and they’re just kind of lost in the kitchen,” she says. “Even though people appreciate food, they don’t necessarily know how to prepare it.” Start teaching your next generation with a little sneaky mac and cheese.

SLOW COOKER BUTTERNUT MAC AND CHEESE

granville's mac and cheese
PHOTOS COURTESY GRANVILLE

Serves 4-6

2 cups shredded mozzarella cheese, divided

1 cup shredded cheddar cheese

½ cup Gruyere cheese (applewood smoked, if desired)

12-ounce can evaporated milk

½ cup whole milk

4 ounces cream cheese, cubed (1½ cups)

8 ounces diced butternut squash

¼ cup unsalted butter (preferably grass-fed)

½ teaspoon kosher salt

Pinch of black pepper

Pinch of freshly grated nutmeg

12 ounces dried cellentani pasta (corkscrew shape, 3¾ cups)

3 cups broccoli florets or asparagus

Grilled chicken, cooked bacon crumbles, ham, sausage or lobster (optional)

Place one cup mozzarella cheese and the cheddar and Gruyere cheeses, evaporated and whole milk, cream cheese, squash, butter, salt, pepper and nutmeg in a slow cooker. Mix well.

Cook on low for two hours, setting the cooker to switch to “keep warm” mode until you want to continue with the recipe. Test the squash and make sure that it is fork tender. (The sauce will be a bit curdled.) Transfer the sauce to a blender or use an immersion blender to blend until the sauce is smooth. If there are any firm bits stuck to the bottom of the cooker, discard them.

Bring a large stock pot of salted water to a boil. Add the pasta and boil until al dente. If using broccoli, add it during the last two to three minutes of cook time. If using asparagus, add it during the last 30 seconds. Drain the pasta and vegetables and place in a serving dish.

Pour half of the warm cheese sauce over the pasta and vegetables. Sprinkle with the second cup of mozzarella cheese. Pour the remaining sauce over the pasta. Gently stir to coat pasta with sauce.

Originally published in L.A. Parent. For more family recipes from award-winning chefs, visit LA Parent/Recipes

Although breakfast is the most important meal of the day, many of us resort to sugar-laden cereal bars or fast food on busy weekday mornings. Feeding your family a nutritious breakfast is crucial though for creating happy and focused minds throughout busy school and work days. These healthy and delicious breakfast meal prep recipes make eating on the go a breeze for the entire family.

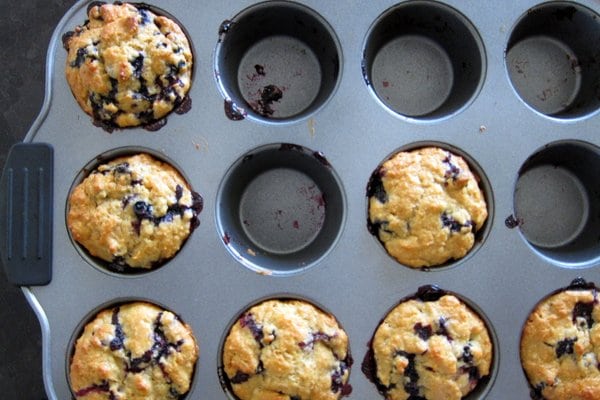
Honey-Sweetened Blueberry Muffins

Most store-bought muffins contain loads of added sugar and processed ingredients. These healthier blueberry muffins make for an easy and satisfying grab-and-go breakfast in the morning. Just prepare a big batch on Sunday, freeze some and keep them for the whole week.

Recipe here

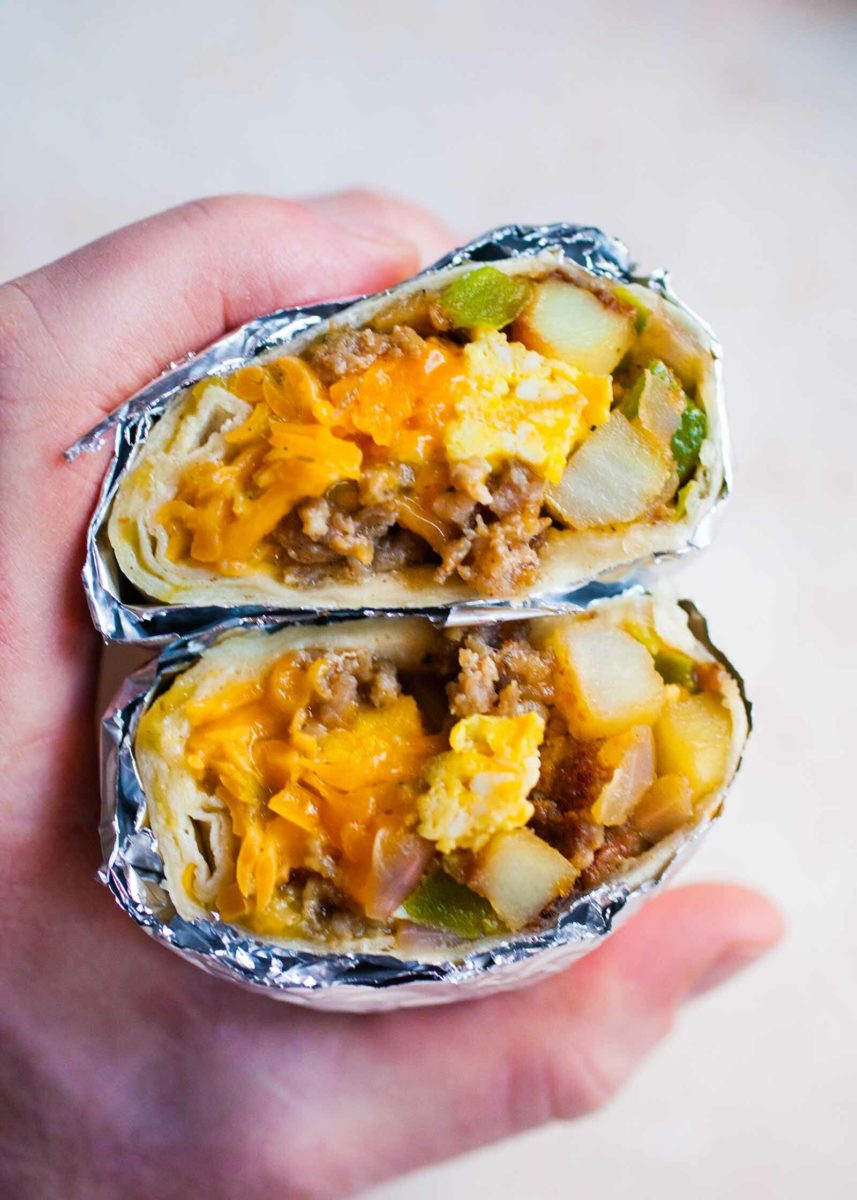
Freezer Breakfast Burritos With Sausage, Eggs, and Salsa Verde

Breakfast burritos are portable, yummy and perfect for meal prepping. Simply make as many burritos as your family will need for the week, customizing ingredients to your liking, and pop them in the freezer. Reheat in the microwave or skillet the morning you need them, and you have a delicious and filling breakfast for the whole family.

Recipe here

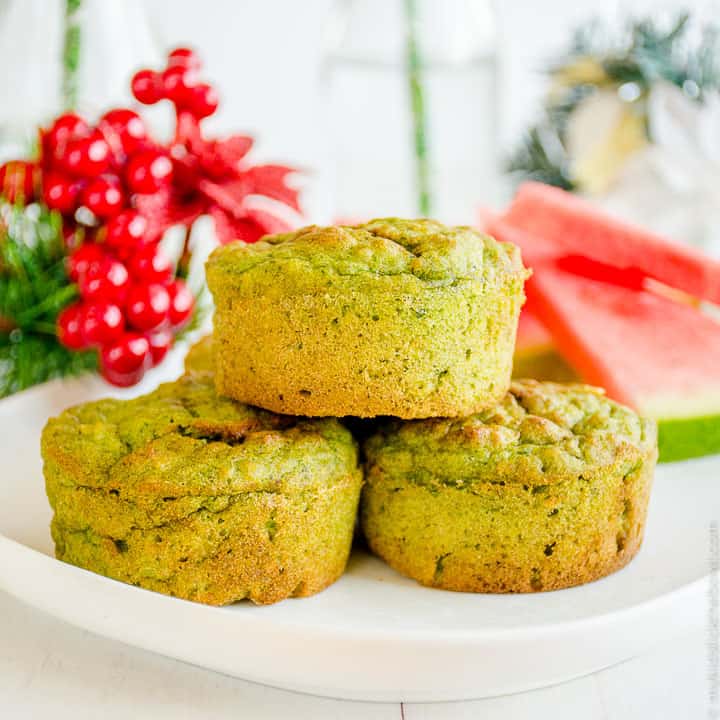
Spinach Muffins for Toddlers

When sending your little one to preschool, you want to be sure they’re getting a healthy breakfast they will also enjoy. These easy muffins can be stored in an airtight container for a few days, or they can be frozen and saved for later. Mild in flavor and full of nutrition, these spinach muffins are perfect for busy mornings.

Recipe here

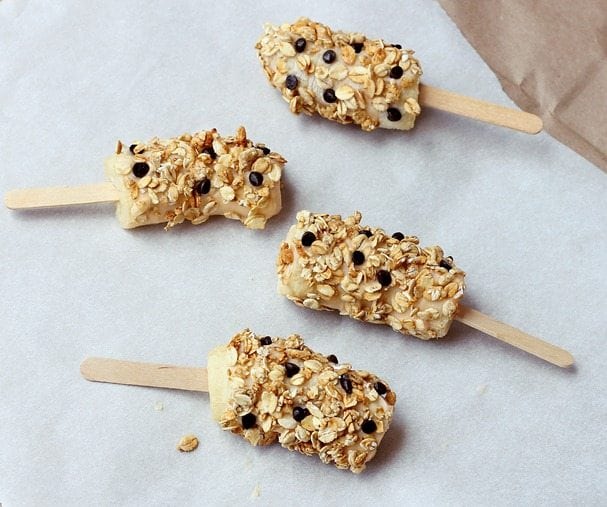
Breakfast Banana Pops

Although these pops last all week long, don’t be surprised if your kids are tempted to devour them all in one day. This healthy breakfast is delicious, completely mess free and can easily be prepared in advance. What’s not to love?

Recipe here

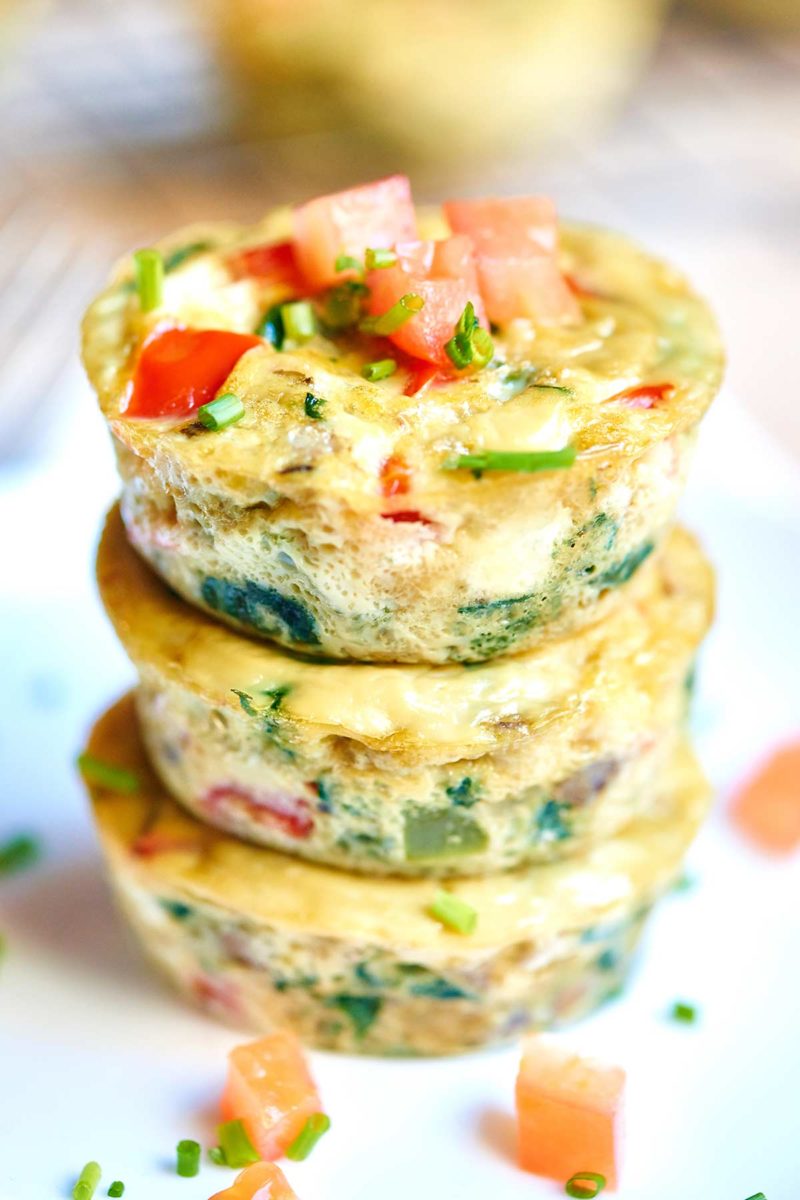
Healthy Egg Muffin Cups

Eggs are a great start to any morning, but most families save them for the weekend. With these though, nutritious and delicious eggs can become a staple family breakfast all week long. Baking eggs into freezable breakfast cups is a perfect way to add veggies to your children’s diets, and they provide the energy they need to get them through busy school mornings.

Recipe here

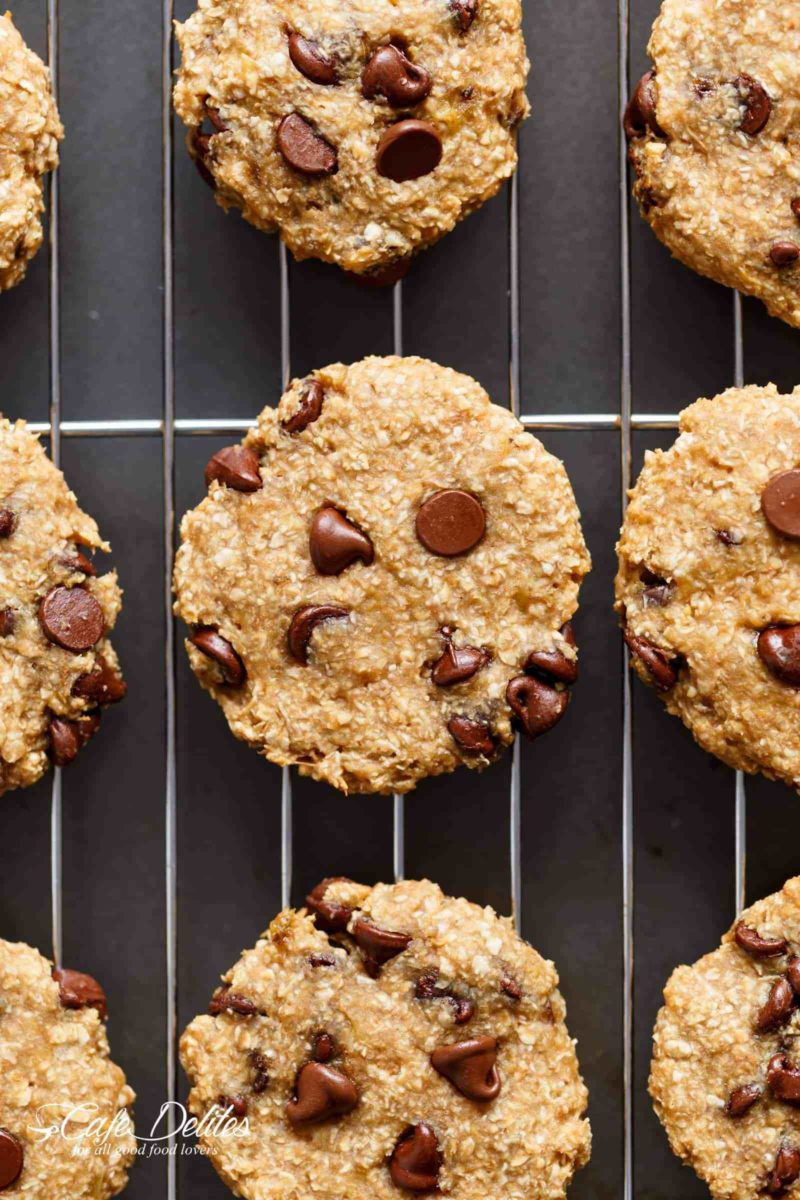
Healthy 2-Ingredient Breakfast Cookies

This recipe is so simple and healthy; you’re whole family will fall in love with them. Only two ingredients, allergen-friendly, and extremely customizable, these breakfast cookies will leave your kids satisfied and ready for the day. These are perfect for meal prepping for school days as they are sure to make your kids excited to get up in the mornings.

Recipe here

Strawberry Breakfast Bites

When food is fun, nutritious, and delicious, what more could you ask for? These strawberry breakfast bites are super easy to make, great for kids of any age, and they are even nut free. Perfectly portable, these strawberry breakfast bites are great for busy weekday mornings.

Recipe here

Don’t Miss Out On The Fun

Sign up for our ENews and be the first to know the latest on toys & family must-haves, giveaways & gift and play ideas!

No Thanks Let's Connect

Family must-haves, articles & giveaways